


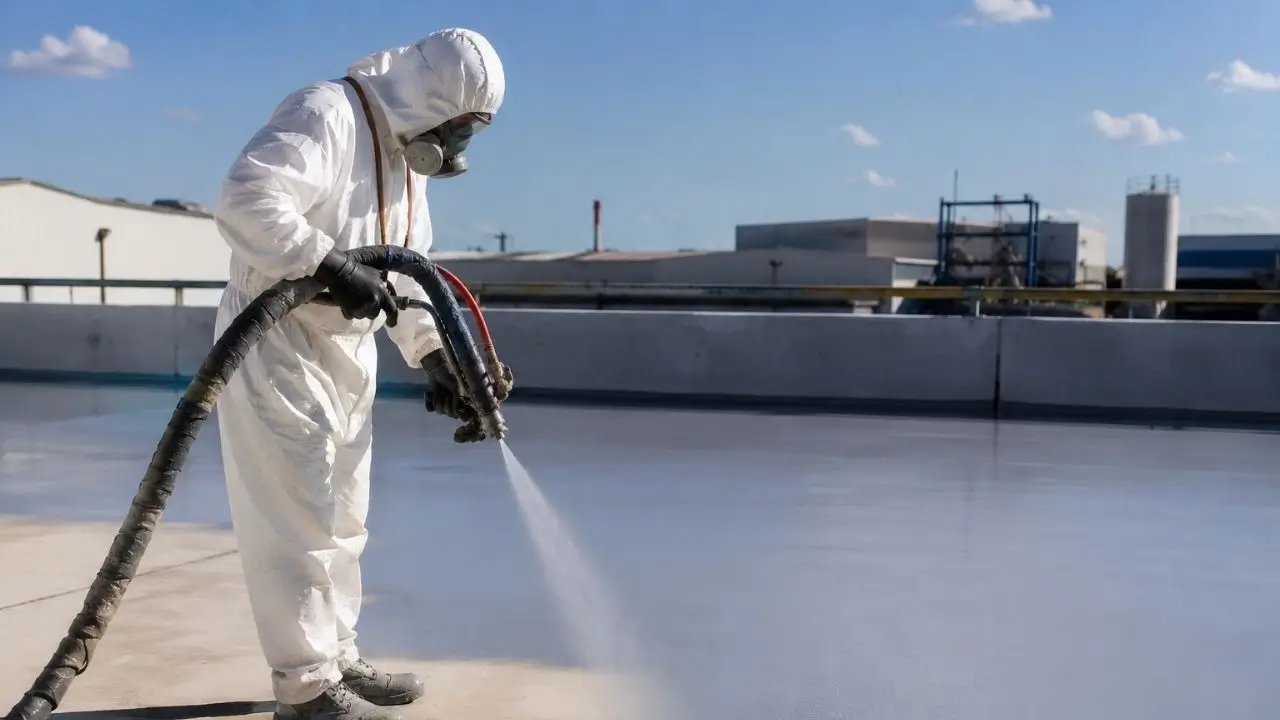
Polyurea coatings offer unparalleled durability, rapid curing times, and exceptional waterproofing capabilities for industrial and commercial concrete surfaces. However, the ultimate success and longevity of any polyurea application depend entirely on the quality of the surface preparation. Concrete is an inherently porous and variable material that frequently harbors latent moisture, chemical contaminants, and structural weak points that can catastrophically compromise coating adhesion. Failing to adequately prepare the substrate will inevitably lead to delamination, blistering, and premature coating failure, regardless of the polyurea system's inherent quality. Achieving a flawless, long-lasting bond requires a systematic approach to cleaning, repairing, and profiling the concrete prior to spraying. This comprehensive guide outlines the critical steps required to transform a raw or compromised concrete slab into an optimized substrate ready to receive a high-performance polyurea elastomeric coating.
Preparing concrete surfaces before applying a polyurea coating is the single most critical phase of any industrial flooring project. Polyurea is renowned for its rapid curing time, extreme durability, chemical resistance, and high tensile strength. However, the advanced chemical bonds of polyurea demand an impeccably prepped substrate to ensure long-term adhesion. If the concrete is contaminated, weak, damp, or structurally compromised, the coating will inevitably fail through delamination, blistering, or pinholing. Proper preparation requires a methodical approach that addresses structural integrity, surface profile, moisture content, and cleanliness. Mastering these essential substrate preparation techniques guarantees that the polyurea system achieves its full protective potential across demanding commercial and industrial environments.
Understanding Concrete Surface Profiles (CSP)
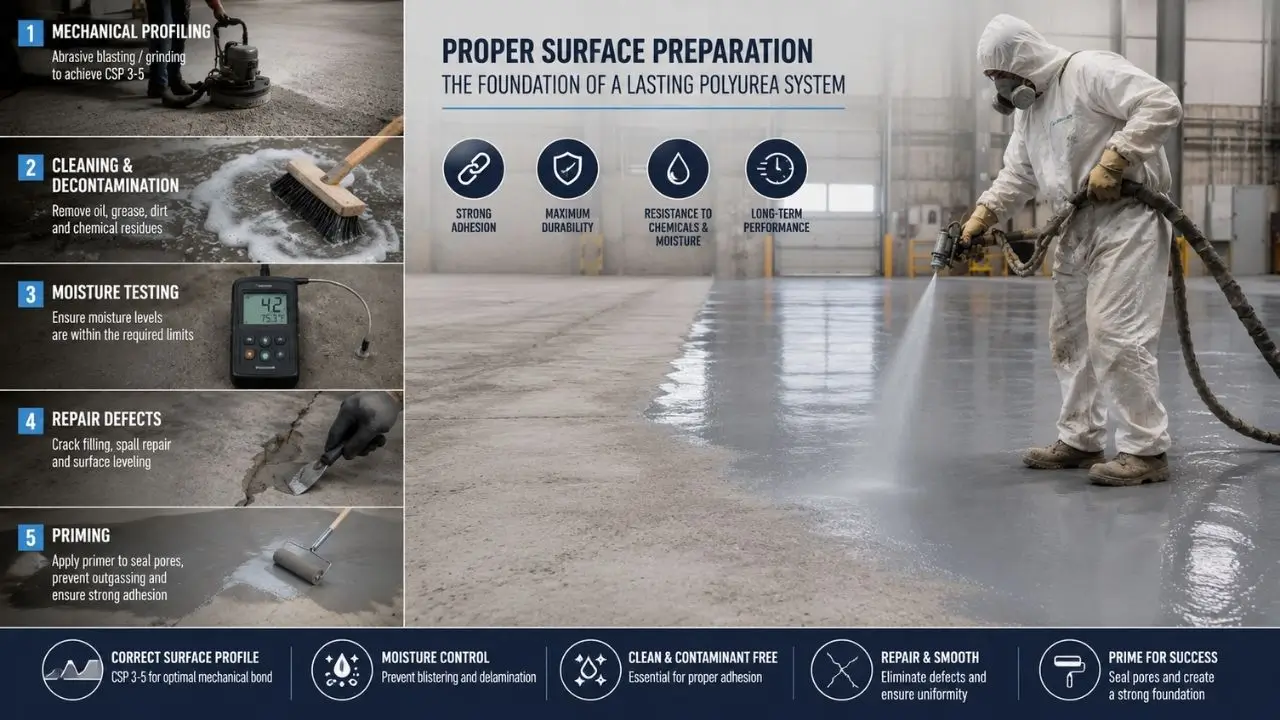
Achieving the correct Concrete Surface Profile (CSP) is fundamental to creating a strong mechanical bond between the polyurea coating and the underlying concrete substrate. The International Concrete Repair Institute (ICRI) standardizes these profiles on a scale from CSP 1 (neat/smooth) to CSP 9 (heavy scarification). For polyurea applications, field experts typically recommend achieving a CSP 3 to CSP 5 profile. This texture provides sufficient surface area and anchor pattern without creating jagged peaks that could lead to thin spots in the applied membrane.
Selecting the appropriate mechanical profiling method depends entirely on the condition of the concrete and the specific requirements of the polyurea system. Shot blasting is widely considered the industry gold standard for achieving a uniform CSP 3 to CSP 5, as it simultaneously cleans and textures the slab. For smaller or tighter areas, mechanical grinding with diamond-segmented tooling offers precise control, though care must be taken not to polish the surface. Over-grinding creates an overly smooth profile that prevents the polyurea from locking mechanically into the concrete pore structure.
Concrete Moisture Testing and Management
Moisture within concrete slabs represents one of the most common causes of premature polyurea coating failure. As moisture vapor migrates upward through the porous concrete matrix, it exerts hydrostatic pressure against the impermeable polyurea layer, resulting in osmotic blistering and adhesion loss. Before applying any coating, technicians must conduct rigorous quantitative moisture testing to determine the concrete vapor emission rate. Standard testing methods include the Calcium Chloride Test (ASTM F1869) and Relative Humidity Probe Testing (ASTM F2170) inserted directly into the core of the concrete structure.
If moisture testing reveals levels exceeding the manufacturer's maximum threshold, effective mitigation strategies must be implemented immediately. Applying a specialized, deeply penetrating epoxy moisture vapor barrier primer creates an impermeable seal over the concrete slab, suppressing moisture vapor transmission to acceptable levels. Failing to address high moisture conditions guarantees system degradation, regardless of how thoroughly the surface was mechanically prepped. Properly managing moisture ensures that the elastomeric polyurea membrane remains securely bonded over its intended service life.
Cleaning and Decontamination Procedures
Contaminants such as oil, grease, silicone, curing compounds, and chemical residues act as bond breakers that severely impair polyurea adhesion. Even microscopic layers of hydrocarbons prevent the primer from wetting out and penetrating the concrete pores properly. Initial decontamination begins with applying heavy-duty industrial degreasers combined with scrubbing to lift oils out of the porous substrate. Hot-water high-pressure washing is often utilized afterward to thoroughly flush out loosened contaminants, salts, and residual cleaning agents from the deep pores of the slab.
After chemical degreasing, the concrete must undergo complete dust removal to clear away dry particulate matter, laitance, and loose debris. Standard sweeping is insufficient for coating preparation because fine silica particles remain embedded in the surface texture. Industrial-grade vacuum equipment equipped with high-efficiency particulate air (HEPA) filters must be swept meticulously across the entire slab. Ensuring a dust-free environment immediately prior to priming allows the polyurea primer to form an uninterrupted chemical and mechanical bond with the sound concrete substrate.
Repairing Cracks, Spalls, and Surface Defects
A smooth, structurally sound substrate is necessary to prevent telegraphing, pinholing, and uneven stress distribution within the elastomeric polyurea layer. All existing cracks, control joints, spalls, and honeycomb areas must be evaluated and repaired before primary coating application. Dynamic cracks subject to structural movement require proper routing using a V-shaped diamond blade, followed by filling with a flexible joint filler or polyurea joint sealant. Static cracks, on the other hand, should be chased, thoroughly cleaned, and rigid-filled with high-strength structural epoxy or fast-curing polyurethane repair materials.
Deep spalls and pitted concrete require rebuilds using low-viscosity repair mortars or polymer-modified concrete compounds engineered for fast re-coating. Once the patching compounds have fully cured, they must be ground flush with the surrounding slab profile to maintain a seamless finish. Neglecting surface defects allows air trapped within open voids to expand during the exothermic curing process of polyurea, causing unsightly pinholes or micro-blisters in the final membrane. Thorough defect repair establishes a continuous foundation that optimizes overall coating performance.
Applying Primers and Outgassing Mitigators
Priming represents the final critical step in preparing concrete for a high-performance polyurea spray application. Concrete is inherently porous, filled with microscopic voids that retain air and moisture. When hot-applied rapid-cure polyurea hits bare concrete, the sudden thermal expansion forces air out of these pores—a phenomenon known as concrete outgassing. Applying a high-penetration epoxy or polyurethane primer seals these open capillary pores, blocks air displacement, and creates a uniform surface tension that maximizes the adhesion of the secondary polyurea layer.
| Primer Type | Primary Function | Typical Recoat Window | Ideal Substrate Condition |
|---|---|---|---|
| Epoxy Primer | Outgassing prevention, deep pore penetration, high tensile adhesion | 8 to 24 Hours | Dry, mechanically profiled concrete |
| Moisture Tolerant Primer | Blocks high vapor transmission, seals damp slabs | 6 to 12 Hours | Slabs exceeding normal RH limits |
| Polyurea/Polyurethane Primer | Fast turnaround, rapid chemical tie-coat bonding | 1 to 4 Hours | Clean, dry concrete in tight project windows |
Selecting the correct primer depends heavily on job site environmental conditions, project timelines, and concrete moisture readings. The primer must be allowed to cure to a tack-free state within its designated recoat window to establish optimal chemical cross-linking with the polyurea. If the recoat window is exceeded, the primed surface must be lightly abraded to restore mechanical grip before spraying the final elastomeric layer. Following precise primer application protocols guarantees a resilient, monolithic, and long-lasting polyurea surface system.
Preparing concrete surfaces before applying a polyurea coating is the single most critical phase of any industrial flooring project. Polyurea is renowned for its rapid curing time, extreme durability, chemical resistance, and high tensile strength. However, the advanced chemical bonds of polyurea demand an impeccably prepped substrate to ensure long-term adhesion. If the concrete is contaminated, weak, damp, or structurally compromised, the coating will inevitably fail through delamination, blistering, or pinholing. Proper preparation requires a methodical approach that addresses structural integrity, surface profile, moisture content, and cleanliness. Mastering these essential substrate preparation techniques guarantees that the polyurea system achieves its full protective potential across demanding commercial and industrial environments.
Understanding Concrete Surface Profiles (CSP)
Achieving the correct Concrete Surface Profile (CSP) is fundamental to creating a strong mechanical bond between the polyurea coating and the underlying concrete substrate. The International Concrete Repair Institute (ICRI) standardizes these profiles on a scale from CSP 1 (neat/smooth) to CSP 9 (heavy scarification). For polyurea applications, field experts typically recommend achieving a CSP 3 to CSP 5 profile. This texture provides sufficient surface area and anchor pattern without creating jagged peaks that could lead to thin spots in the applied membrane.
Selecting the appropriate mechanical profiling method depends entirely on the condition of the concrete and the specific requirements of the polyurea system. Shot blasting is widely considered the industry gold standard for achieving a uniform CSP 3 to CSP 5, as it simultaneously cleans and textures the slab. For smaller or tighter areas, mechanical grinding with diamond-segmented tooling offers precise control, though care must be taken not to polish the surface. Over-grinding creates an overly smooth profile that prevents the polyurea from locking mechanically into the concrete pore structure.
Concrete Moisture Testing and Management
Moisture within concrete slabs represents one of the most common causes of premature polyurea coating failure. As moisture vapor migrates upward through the porous concrete matrix, it exerts hydrostatic pressure against the impermeable polyurea layer, resulting in osmotic blistering and adhesion loss. Before applying any coating, technicians must conduct rigorous quantitative moisture testing to determine the concrete vapor emission rate. Standard testing methods include the Calcium Chloride Test (ASTM F1869) and Relative Humidity Probe Testing (ASTM F2170) inserted directly into the core of the concrete structure.
If moisture testing reveals levels exceeding the manufacturer's maximum threshold, effective mitigation strategies must be implemented immediately. Applying a specialized, deeply penetrating epoxy moisture vapor barrier primer creates an impermeable seal over the concrete slab, suppressing moisture vapor transmission to acceptable levels. Failing to address high moisture conditions guarantees system degradation, regardless of how thoroughly the surface was mechanically prepped. Properly managing moisture ensures that the elastomeric polyurea membrane remains securely bonded over its intended service life.
Cleaning and Decontamination Procedures
Contaminants such as oil, grease, silicone, curing compounds, and chemical residues act as bond breakers that severely impair polyurea adhesion. Even microscopic layers of hydrocarbons prevent the primer from wetting out and penetrating the concrete pores properly. Initial decontamination begins with applying heavy-duty industrial degreasers combined with scrubbing to lift oils out of the porous substrate. Hot-water high-pressure washing is often utilized afterward to thoroughly flush out loosened contaminants, salts, and residual cleaning agents from the deep pores of the slab.
After chemical degreasing, the concrete must undergo complete dust removal to clear away dry particulate matter, laitance, and loose debris. Standard sweeping is insufficient for coating preparation because fine silica particles remain embedded in the surface texture. Industrial-grade vacuum equipment equipped with high-efficiency particulate air (HEPA) filters must be swept meticulously across the entire slab. Ensuring a dust-free environment immediately prior to priming allows the polyurea primer to form an uninterrupted chemical and mechanical bond with the sound concrete substrate.
Repairing Cracks, Spalls, and Surface Defects
A smooth, structurally sound substrate is necessary to prevent telegraphing, pinholing, and uneven stress distribution within the elastomeric polyurea layer. All existing cracks, control joints, spalls, and honeycomb areas must be evaluated and repaired before primary coating application. Dynamic cracks subject to structural movement require proper routing using a V-shaped diamond blade, followed by filling with a flexible joint filler or polyurea joint sealant. Static cracks, on the other hand, should be chased, thoroughly cleaned, and rigid-filled with high-strength structural epoxy or fast-curing polyurethane repair materials.
Deep spalls and pitted concrete require rebuilds using low-viscosity repair mortars or polymer-modified concrete compounds engineered for fast re-coating. Once the patching compounds have fully cured, they must be ground flush with the surrounding slab profile to maintain a seamless finish. Neglecting surface defects allows air trapped within open voids to expand during the exothermic curing process of polyurea, causing unsightly pinholes or micro-blisters in the final membrane. Thorough defect repair establishes a continuous foundation that optimizes overall coating performance.
Applying Primers and Outgassing Mitigators
Priming represents the final critical step in preparing concrete for a high-performance polyurea spray application. Concrete is inherently porous, filled with microscopic voids that retain air and moisture. When hot-applied rapid-cure polyurea hits bare concrete, the sudden thermal expansion forces air out of these pores—a phenomenon known as concrete outgassing. Applying a high-penetration epoxy or polyurethane primer seals these open capillary pores, blocks air displacement, and creates a uniform surface tension that maximizes the adhesion of the secondary polyurea layer.
| Primer Type | Primary Function | Typical Recoat Window | Ideal Substrate Condition |
|---|---|---|---|
| Epoxy Primer | Outgassing prevention, deep pore penetration, high tensile adhesion | 8 to 24 Hours | Dry, mechanically profiled concrete |
| Moisture Tolerant Primer | Blocks high vapor transmission, seals damp slabs | 6 to 12 Hours | Slabs exceeding normal RH limits |
| Polyurea/Polyurethane Primer | Fast turnaround, rapid chemical tie-coat bonding | 1 to 4 Hours | Clean, dry concrete in tight project windows |
Selecting the correct primer depends heavily on job site environmental conditions, project timelines, and concrete moisture readings. The primer must be allowed to cure to a tack-free state within its designated recoat window to establish optimal chemical cross-linking with the polyurea. If the recoat window is exceeded, the primed surface must be lightly abraded to restore mechanical grip before spraying the final elastomeric layer. Following precise primer application protocols guarantees a resilient, monolithic, and long-lasting polyurea surface system.
Evaluating and Addressing Structural Concrete Imperfections
Before introducing any mechanical preparation equipment, the concrete surface must undergo a rigorous structural evaluation to identify existing faults. Technicians must actively search for signs of spalling, extensive cracking, and areas of deteriorated or crumbling concrete that cannot support a heavy-duty coating system. Simply spraying polyurea over structural defects will only mask the problem temporarily, as the underlying movement will eventually transfer through the elastomeric layer and cause mirroring or tearing. Any identified cracks, joints, and spalls must be systematically routed out using a V-blade grinder to expose solid, uncontaminated concrete walls within the defect. Once the deteriorated material is completely removed, the voids must be meticulously vacuumed to eliminate all dust and loose particulate matter.
Following the routing and cleaning phase, all routed cracks and structural voids must be filled with a compatible high-strength repair material. Standard cementitious patching compounds are generally discouraged because they require extended curing times and often fail to provide the tensile strength needed beneath polyurea. Instead, rapid-curing polyurea joint fillers or high-modulus epoxy repair mortars should be utilized to effectively bridge the gaps. These specialized materials cure quickly, flush evenly with the surrounding slab, and provide a seamless structural transition that eliminates weak points. Ensuring that all repairs are completely flush with the existing concrete elevation is paramount; any remaining ridges or depressions will remain highly visible and potentially compromise the final aesthetic and functional integrity of the applied polyurea membrane.
Thorough Decontamination and Chemical Cleaning Protocols
Even newly poured concrete surfaces harbor chemical residues, curing compounds, or form-release agents that act as invisible bond breakers between the substrate and the polyurea coating. Older industrial slabs frequently contain deep-seated oil stains, grease, animal fats, or industrial chemicals that must be entirely extracted before any mechanical profiling begins. If these contaminants are not completely removed, subsequent grinding or shot blasting processes will simply drive the foreign substances deeper into the concrete's capillary network. The initial decontamination phase should always involve scrubbing the slab with industrial-grade degreasers, utilizing concentrated alkaline detergents specifically formulated to break down hydrocarbon structures. For heavily saturated areas, the application of chemical poultices or specialized bio-enzymatic cleaners may be required to actively draw deeply embedded oils out of the porous concrete matrix.
Once the chemical degreasers have effectively emulsified the surface contaminants, the entire slab requires an aggressive hot-water power washing to flush the residues away completely. Utilizing a minimum of 3,000 PSI with hot water ensures that the chemical solutions and suspended contaminants are entirely evacuated from the concrete's surface profile. Following this deep cleaning, the concrete must be allowed to dry sufficiently before undergoing any mechanical preparation steps. It is critical to perform a simple water-drop test across various sections of the cleaned floor; if water beads up on the surface rather than penetrating the concrete instantly, residual contaminants or sealers are still present. In such cases, the chemical cleaning process must be repeated until the concrete demonstrates uniform porosity across the entire designated application area.
Mechanical Profiling Strategies for Optimal Adhesion
To guarantee a mechanical lock between the concrete substrate and the fast-curing polyurea coating, the surface must be intentionally roughened to a specific texture profile. The International Concrete Repair Institute (ICRI) standardizes these textures using Concrete Surface Profile (CSP) ratings ranging from one to ten. Polyurea applications generally require a surface profile between CSP 3 and CSP 5 to ensure the liquid coating can effectively penetrate and grip the substrate before curing. Achieving this precise texture invariably requires heavy-duty mechanical preparation methods, specifically planetary diamond grinding or captive shot blasting. Diamond grinding is highly effective for removing minor surface imperfections, thin mil coatings, and creating a uniform CSP 3 texture, making it ideal for standard commercial floor spaces where aggressive removal is not strictly necessary.
For heavy industrial environments or surfaces requiring thicker polyurea systems, captive shot blasting stands as the industry-preferred method for achieving a robust CSP 4 or CSP 5 profile. This highly efficient process propels metallic abrasive particles at high velocity against the concrete, simultaneously fracturing the slick top paste layer and immediately vacuuming away the resulting debris. Shot blasting exposes the underlying aggregate, creating a deep, macro-textured surface that drastically increases the total surface area available for the coating to grip. Regardless of whether grinding or shot blasting is utilized, edge work must be completed using handheld grinders equipped with dust extraction shrouds. Finally, the entire area must undergo a meticulous industrial vacuuming pass to remove the microscopic silica dust that inevitably settles back onto the slab.
Managing Moisture Vapor Transmission Rates
Moisture is arguably the most destructive enemy of any impermeable elastomeric coating, making rigorous moisture testing an absolute necessity prior to polyurea application. Concrete acts as a rigid sponge, continuously drawing moisture vapor up from the earth through a process known as capillary action. If polyurea is applied over a slab with high moisture vapor transmission rates, the trapped vapor will inevitably generate immense hydrostatic pressure beneath the impermeable membrane. This trapped energy will aggressively push against the coating, ultimately resulting in catastrophic blistering, pinholing, and widespread delamination. Surface-level moisture meters are insufficient for this diagnostic process; contractors must utilize in-situ relative humidity probes installed directly into the concrete slab according to ASTM F2170 testing standards to obtain accurate internal moisture readings.
| Relative Humidity (RH) | Moisture Condition | Recommended Action Plan |
| Below 75% | Safe / Standard | Proceed with standard epoxy or polyurea primer application. |
| 75% - 85% | Elevated | Apply a standard moisture-mitigating epoxy primer system. |
| 86% - 95% | High | Requires a specialized high-build moisture vapor barrier primer. |
| Above 95% | Severe | Consult engineering; highly aggressive vapor reduction systems required. |
When internal testing indicates elevated relative humidity levels exceeding the safe threshold, specialized moisture mitigation strategies must be aggressively implemented before the polyurea is sprayed. Standard practice dictates the application of a one hundred percent solids, deeply penetrating epoxy moisture vapor barrier primer designed specifically to withstand high hydrostatic pressure. These advanced primer systems penetrate the concrete's open capillaries and cure to form an impermeable blocking layer that effectively caps the vapor drive. Even on slabs with low moisture readings, applying an appropriate primer is highly recommended to seal the porous substrate, prevent outgassing, and enhance the overall bond strength of the polyurea topcoat.
Executing the Primer Application and Final Inspection
The application of a compatible primer system serves as the final and arguably most crucial preparatory step before the primary polyurea membrane is deployed. Primers fulfill multiple essential functions: they seal the porous concrete to prevent trapped air from rising and creating pinholes in the fast-curing polyurea, they mitigate residual moisture vapor, and they establish a chemical tie-coat that dramatically enhances overall adhesion. Most professional installers utilize two-component epoxy or specialized polyurethane primers formulated specifically for compatibility with pure polyurea systems. The primer must be applied uniformly using squeegees and back-rolled to ensure complete substrate saturation without leaving thick, unyielding puddles. Installers must carefully monitor the environmental conditions, as temperature and ambient humidity significantly dictate the primer's working time and necessary curing window.
Following the primer application, the entire surface requires a meticulous final inspection before the polyurea spraying equipment is activated. Technicians must visually scan the primed slab to identify any outgassing bubbles, dry spots where the concrete absorbed the primer too rapidly, or particulate contamination that settled during the curing phase. Any identified dry spots or pinholes must be re-primed and allowed to cure to guarantee a completely monolithic, sealed surface. Furthermore, installers must strictly adhere to the primer manufacturer's specified recoat window; applying polyurea too early can trap solvents, while waiting too long can result in a loss of chemical adhesion. Once the primed surface is flawless and within the optimal recoat window, the concrete is officially prepared to receive the high-performance polyurea coating.
Protect more. Finish faster. Choose the Dryfix Polyurea System for seamless, high-performance waterproofing built to withstand the toughest conditions.